You have a phone ready to record, but you are not sure where to put it. A useful golf swing video starts with a clear view of the movement. Ask your instructor which views and setup they want before filming.
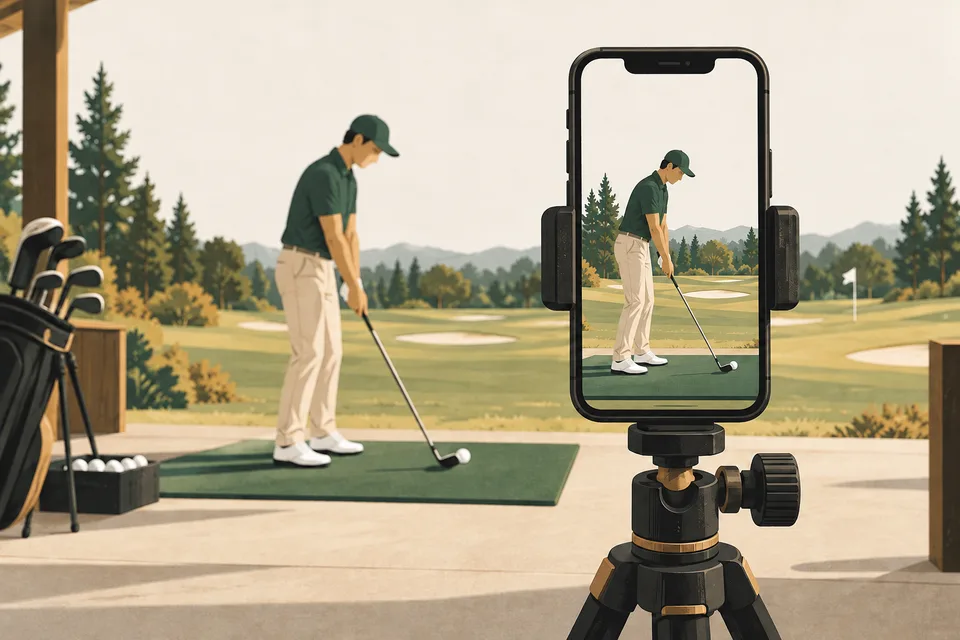
Two terms first: Address means your starting position before the swing. The target line is the imaginary line from the ball toward your intended target.
The two camera views
This guide uses the following baseline. Camera instructions can vary; follow your instructor's setup if different.
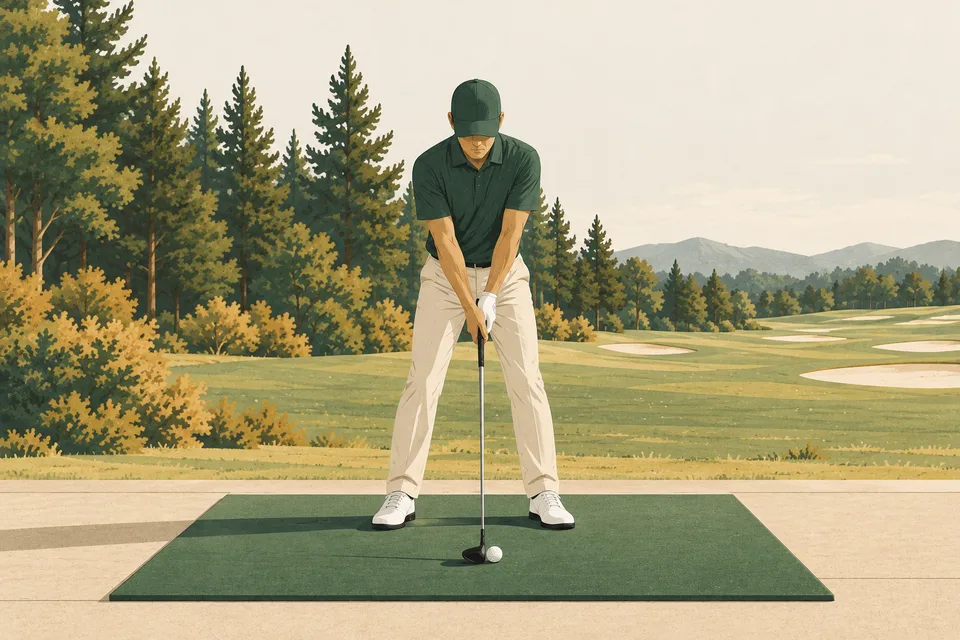
Face-on: opposite the middle of your stance
The phone faces the middle of your stance, perpendicular to the target line. In plain language, it looks toward you from the side of that line rather than along it. Keep the lens near hand height at address, and move the phone far enough back to capture your body and the full club movement.
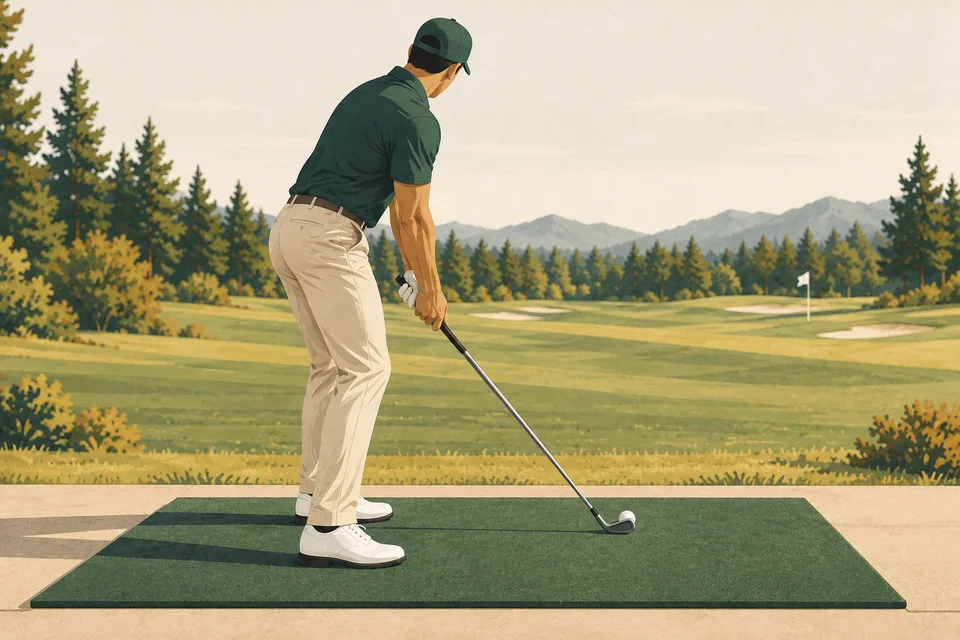
Down-the-line: behind your hands
For the hand-line method used here, position the phone behind your hands at address, looking parallel to the target line. The hand line is separate from the ball-to-target line; do not simply put the phone behind the ball. Keep the lens near hand height and include your body and full club movement.
Face-on view — address
Down-the-line view — address
Your five-item test-clip checklist
Before recording the clip you want to keep, make a short test recording and review the entire movement.
- Check permission and space. Follow the facility's filming rules. Keep the phone and its support clear of swings, walkways and other people's space.
- Steady the phone. Use suitable support and confirm it stays in position while recording.
- Check the requested view. Confirm the camera's position, direction and lens height before you begin. Use your instructor's instructions when they differ from this baseline.
- Play back the full test clip. Check your head, feet, hands and the club throughout the movement, including the top of the swing and the finish. If something leaves the frame, adjust the framing and test again.
- Keep the setup consistent. Note the view and camera position if you plan to compare clips. A change in camera angle can change how the movement looks.
Keep a note with your clip
You do not need to identify a swing fault before showing the recording to an instructor. Name the task, describe one thing you noticed, and keep one question. Copy these prompts into your notes:
View: Face-on / Down-the-line
Task: What was I trying to practice?
Notice: What did I observe in this clip?
Question: What would I like my instructor to explain?
If you want a blank structure for the rest of your session, use the three-prompt practice note. Preparing for a lesson? Take three questions to ask your instructor.
A video is a record, not a diagnosis
A clip can show an instructor what happened. By itself, it does not tell you why a shot behaved a certain way or which movement you should change. This guide explains a camera baseline, not a personal swing assessment.
Camera references
- LPGA: How to Film a Lesson Video (PDF) — the face-on body-midline and hand-line down-the-line geometry used here. The document's certification submission requirements are not part of this guide.
- Titleist: Camera-height reference and full-swing framing reference — hand-height lens position and enough room for the entire swing.
- V1 Sports: How to Film Your Golf Swing — steady support, a test recording and full-club framing. It uses a different face-on and height setup; this guide does not suggest that every source uses the same method.
References support the camera discussion; they do not imply endorsement of or affiliation with JAMY PRO.
One next step
Keep a practice note